
Can't believe it's already the last day of 2012 - as cliché as it may sound - time really flies! I went to do a quick calculation of my posts, and I found out that this is my 100th post for the year! It was a huge improvement as compared to last year (I only blogged 50 posts last year!) And out of these 100 posts, 22 (including this one) were savoury meals, 52 were sweets and desserts (which meant I bake a new dessert once a week, wow!), 20 were travel posts and 6 were miscellaneous posts. I hope I'll be able to maintain this standard for the coming year ;)
I tried out a lot more savoury dishes this year, partly because I want to increase the different types of recipes my blog offers and also because I want to cut down on eating out on weekends. So, for the last post of the year, I'm ending it with a Baked Cheesy Chicken recipe by Martha Stewart - which is another 30-minute-only recipe:

Dredge the chicken breast in flour.

Coat the chicken breast with a beaten egg.

Then dip it into seasoned bread crumbs (I used Panko) - sorry for the blurred photo, shaky hands!

Bake until almost done and sprinkle some more cheese on top.
And, ta-da!
This is a ridiculously easy and quick recipe and I really have to hand it to Martha Stewart, she's really amazing to come up with all these easy recipes!
What's interesting about this dish is that Parmesan cheese is added into the breadcrumbs. There is also an addition of cheese on top - I'm supposed to use Mozzarella cheese but I used Emmental instead as that's what I had on hand. The resulting chicken breast has a sharp, cheezy taste - and because only one side of the chicken is coated in the mixture, the taste is not overwhelming. The only downside is that the chicken breast is a little dry, so I ate it with some ketchup, but overall I'm still very happy with how easy and yummy this dish was.
Time to dig in!
I am submitting this recipe to Cook Like A Star, an event hosted by hosted by Zoe from Bake for Happy Kids, Baby Sumo from Eat your heart out and Riceball from Riceball Eats. Do scroll down to the bottom and see what other bakers/cooks have whipped up!
Sponsored Post
Putting the recipe aside for a while (recipe's at the bottom), just want to share a little of my views: in the past, I had always thought that there's no need for fancy presentation of food because they're all going to end up in my stomach anyway. However, over the years, I realize that the visual taste of food can be just as important as the ingredients in a dish. My interests in food presentation and food photography developed after I started to follow blogs like Tartelette and She Who Eats. Of course, my photos are still nothing compared to them, I have so much more to learn!
Because of my new interest in food photography (besides baking and cooking), I started to collect more dishware - in my opinion, a good plate allows the food to stand out and look a lot more appetizing. I am especially fond of ceramic and glass plates, however, good-quality ones can be very costly to obtain!
 |  |
Photos provided by sponsors
Not too long ago I was very lucky to be sponsored with a set of Corelle® Frost dishware. Corelle® prides itself in manufacturing Vitrelle glass, a tempered glass product consisting of two types of glass laminated into three layers - allowing Corelle® dishware to be thinner and lighter but equally strong as any other dishware. The dishware is resistant to breaking, chipping and cracking, and is also both dishwasher and microwave safe.
Corelle® Frost is a new design launched only about 2 months back, with a very simple and classic design. I am very surprised by how light the plates are so I went to measure one - a 10 1/4-inch dinner plate weighs only 353 grams! It is also really thin, allowing it to be stored away easily. It is my favourite dishware right now and I've used it to serve a few dishes already!
 Pan-Fried Chicken with Mushrooms | 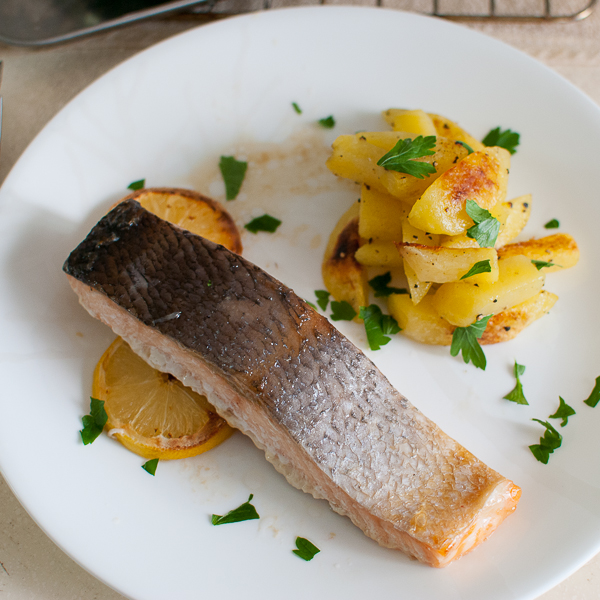 Soy Glazed Salmon |  Baked Cheesy Chicken |
Some of the food that I've used Corelle® dishes to serve in.
For local readers (Singapore): Corelle® Frost set is currently retailing in selected outlets in Courts, Fairprice Finest and Fairprice Xtra. A 20-pc set is retailing at S$320 - it may seemed a little hefty, but a set will definitely last for many years to come, so I'd say it's very worth it!
For overseas readers: I'm not sure if the exact same set is available, but I've seen many other series that are equally pretty and desirable as well on the online store!
Now, back to the recipe!
Baked Cheesy Chicken (serves 2)
adapted from Martha Stewart's Light Chicken Parmesan
Cooking Note: Bake the chicken and the fries together - chicken in the middle rack and the fries in the lowest rack. Check on the fries frequently so that they don't burn. They will take about the same time to be done.
2 chicken breasts
1 tablespoon cornflour
1 egg, beaten
1/2 tablespoon Parmesan cheese
1 tablespoon breadcrumbs (I used Panko)
2 tablespoons cheese (Mozzarella, Emmental etc)
Preheat the oven to 220 degrees Celsius. Line a baking sheet with aluminum foil. Drizzle with a little olive oil and set it aside.
Wash and pat dry the chicken breasts. Place the chicken breasts in between 2 large sheets of baking parchment (or cling film) and pound them using a mallet or a rolling pin until they are of even thickness. Set them aside.
Place the cornflour and egg in two separate, shallow bowls. Combine the Parmesan cheese and breadcrumbs in a third bowl.
Dredge 1 side (only 1 side!) of the chicken breasts in cornflour, egg then cheese-breadcrumbs mixture. Place the chicken breasts on the baking sheet.
Bake the chicken breasts for 10 to 12 minutes in the middle rack until the breadcrumbs has turned a beautiful golden brown and the chicken is almost cooked. Sprinkle the cheese in the middle of the chicken breasts, shift the baking sheet to the top rack and bake for another 3 to 5 minutes until the cheese has melted and lightly browned.
Transfer the chicken breasts onto serving plates and serve with baked fries (recipe follows).
Baked Fries (serves 2)
recipe is adapted from a food magazine, which I copied down a long time ago
Cooking Note: The fries can be baked at a temperature between 200 to 230 degrees Celsius. The hotter the oven, the more attention you have to pay to the fries as they can get burned quite easily.
2 medium potatoes, peeled, washed and sliced thickly
Olive oil
Salt and freshly ground black pepper
Herbs (optional)
Preheat the oven to 220 degrees Celsius. Line a baking sheet with baking parchment. Set it aside.
Place the sliced potatoes in a small pot. Cover with water and add in 1 tablespoon table salt. Bring the water to a boil. Lower it to a simmer and cook until the potatoes are forked tender. Drain and return the potatoes to the pot. Place the pot of potatoes over low heat and toss until all excess water has evaporated.
Drizzle in enough olive oil to coat the potatoes lightly and season with salt and pepper. Add in any herbs if using. While the potatoes are still hot, transfer them to the lined baking sheet in a single layer.
Bake the potatoes in the lowest rack, checking on them frequently, for 15 to 20 minutes until golden brown on all sides. Serve hot.
Happy cooking and a very happy new year to everyone! May 2013 bring all the wonderful and best things to you and your family :)
// <![CDATA[
document.write('');
// ]]>
13 comments: